Self Service

If your car won’t crank fast enough to start, nothing lights up or the lights flicker on your dashboard when you turn the key to crank the position, most likely the battery is dead and you need a boost. Before you start, be careful not to touch any white powder on the batteries as this is highly corrosive. You should also be careful to not touch the red and black cable ends together as this will cause a spark that could potentially ignite the flammable hydrogen gas escaping from the dead battery. DO NOT CONNECT POSITIVE TO NEGATIVE (red to black) AS DOING SO WILL BLOW FUSES OR DESTROY YOUR ECU)

Here is a safe way to boost your vehicle:

  1. Turn off all accessories (radio, fan, lights, even unplug any phone chargers.)
  2. If no booster pack is on hand you will need a second running vehicle parked close enough for your booster cables to reach.
  3. Pop both vehicle’s hoods.
  4. Carefully connect the red booster cable clamp to the positive (RED +) battery / boosting terminal of the dead vehicle.
  5. Connect the other red booster cable clamp to the positive battery/ boosting terminal of the running vehicle.
  6. Connect the black booster cable clamp to the negative (BLACK -) battery terminal of the running vehicle.
  7. Connect the other black booster cable clamp to a bare and substantial metal portion of the dead vehicle’s engine block. *DO NOT CONNECT BLACK CLAMP TO DEAD VEHICLE’S NEGATIVE BATTERY TERMINAL*
  8. Wait 5 minutes; this will allow the dead battery to regain some charge before attempting to start. This is especially important in extreme cold.
  9. Attempt to start dead vehicle. This may take several attempts in cold weather. If the engine will still not crank, double check all your clamp connections, especially the negative clamp connection on the dead vehicle’s bare metal (ground). Sparking is an indicator of a poor connection.
  10. Once vehicle has started, carefully remove all cable ends in reverse order making sure not to touch black to red. Close hoods.

Note:

  • Do not shut off vehicle until the battery has had time to charge (at least 30 min). If the battery has frozen (swollen sides) it will never regain it’s charge and will need to be replaced.
  • Expect to lose all your memory settings, radio, seats, and clock (even any check engine lights will temporarily be erased).
  • Extended storage, extreme cold, parasitic draws, loose and corroded battery terminals will all contribute to hard/ no start conditions.
  • Be sure to have your charging/ starting system checked regularly so you don’t get stranded.
Checking and setting your vehicle’s tire pressure is a simple and easy thing that anyone can do. By making sure your tires are properly inflated you will save gas, optimize tire lifespan and handling performance.

Here’s how:

  1. Find out what your tires should be inflated to. This information can usually be found printed on a white and yellow label inside the driver’s door jam. The tire pressure listed on the side of the tire is not the recommended pressure but the maximum allowable. Note : If the sticker is missing or the tires are not the original manufacturer size or load rating you can go by these guidelines ; P rated tires (P comes before the size like P205/55R17) usually get inflated between 30-40psi. LT rated tires for trucks normally get inflated between 50-80 psi.
  2. Remove valve stem cap (turn counter clockwise).
  3. Press gauge firmly against valve stem and read pressure. Inflate or deflate to desired pressure and then replace valve cap. Note: Tire pressure gauges are not 100% accurate and the readings will vary from gauge to gauge to gauge. Gas station gauges tend to be the least accurate as they get the most abuse.

Tire Pressure Tips

  • Under inflated tires will wear out on prematurely on the outsides, will decrease fuel economy and can even blow out at high speeds.
  • Over inflated tires will wear out prematurely in the centre of the tire, will reduce traction/ handling and can also blow out if inflated passed maximum.
  • If your vehicle is equipped with a tire pressure monitoring system, it can set off a warning light if one of your tire’s pressure is off by only a few psi.
  • Un-equal tire pressures can cause a vehicle pull from side to side. When one tire is lower than the opposite side the vehicle will tend to pull to the side with the lower tire pressure. Un-equal tire pressures can even cause ABS warning lights to come since the un even tire pressure equates to un even wheel spin speed.
  • Tires will lose pressure naturally over time. You can expect to lose up to 2 psi per month. Leaks beyond this are caused by the tire leaking around the sealing surface of the rim or by puncture.
  • Don’t forget to occasionally check the pressure of your spare tire!
A flat tire can be a potentially dangerous situation, flats can be caused by nails, potholes, extremely worn tires, slow leaks around the rim sealing surface, overloading and even just defective tires. When a tire goes flat at high speeds it is easy to lose control, it is important to not panic and to avoid slamming on the brakes or jerking the steering to either side. Slowly pull over to a safe location.

Here is a safe way to mount your spare tire:

  1. Make sure you and your vehicle are safe from oncoming traffic.
  2. Turn on your hazard lights (Red triangle button).
  3. Locate your spare tire, jack and handle, lug nut wrench and locking wheel nut key (if you have locking wheel nuts). Usually the spare tire is in trunk along with the jack and wrench. If you can’t find them than look in your owner’s manual. The locking wheel nut key is usually in the glove box.
  4. Use the Lug nut wrench to loosen the wheel nuts. Some vehicles will have a hubcap that will need to be removed in order to access the wheel nuts. These generally just pull or pry off the rim. Use the lug nut wrench to loosen the wheels about half a turn (counter clockwise). Do not remove the wheel nuts while the car is still on the ground. Use the locking wheel nut key if required. If the wheel nuts are too right to remove you can stomp on the end of the lug nut wrench.
  5. Raise vehicle/ flat tire off the ground. This part is crucial to get right. Consult your owner’s manual in order to locate the proper vehicle jacking point. If the jacking point is too rusty and begins to crumble upon lifting, stop. Crumpling a rusted rocker panel or worse, having the jack fall over is much more expensive than calling Mechanic To You! Once you feel confident that you have found the proper jacking point, raise the vehicle until the tire is about 4-6 inches off the ground.
  6. Remove wheel nuts and pull the tire off the car. Sometimes the wheel will be stuck on the hub and will not simply pull off. This is because of the corrosion build up between the wheel and the vehicle’s hub. The rust can sometimes be broken away by kicking the side of wheel with the back of your foot. If the wheel does not come lose you will probably need a hammer or pry bar to remove it. Neither of which is safe to use under the car with the emergency jack holding the vehicle.
  7. Mount the spare tire on the car. Line up the hub studs with the holes in the rim. Thread the lug nuts onto the studs with the tapered end of the nut facing towards the vehicle. Turn the lug nuts (clockwise) with the lug nut wrench until they are just snug.
  8. Slowly lower the car back to the ground. Lower the jack until the wheel is back on the ground and remove the jack from underneath the car.
  9. Tighten wheel nuts. Tighten the wheel nuts bit by bit in a star pattern. Torque each wheel nut across from the other, this will ensure even torque around the face of the rim. Tighten nuts until it is difficult to tighten them further. Be careful not to over tighten or snap the studs.
  10. Put tools, jack and flat tire back in the vehicle and drive on. Be careful driving on your spare tire as usually they are much smaller and will not give you the same traction or handling characteristics of your regular tire. Spare tires usually have a limit of 80km/ph and should not be used for more than a few days.

Tips:

  • Nail punctures can usually be repaired on the spot or at one of our shops at little cost.
  • Punctures on the tire sidewall cannot be repaired.
  • Slow leaks around the rim require removing the tire from the rim and cleaning the oxidation from the sealing surface.
  • Leak stop products are only temporary and will require eventual removal (dismounting and cleaning inside of tire).
Driving in our harsh Canadian winters offers up some unique challenges that most of the rest of the world is oblivious to. Here are some tips and helpful advice on making it through winter as safe and as comfortable as possible:
  1. Have good tires! This is most important. Driving with bald/ worn out tires in snowy or icy conditions is a recipe for disaster. Any tire should have at least 6/32 of tread depth. If you don’t have a tread depth gauge , place a quarter into the groves of your tire and see if the moose’s nose is covered, if it is than you have adequate tread depth. Winter Tires: Winter tires have a few advantages over all-season tires when it comes to winter driving.
    • They are constructed with a softer rubber compound that grips the road better under 7 degrees Celsius.
    • They have an aggressive tread pattern that pushes slush and water away from the tire.
    • Winter tires will reduce the distance needed to stop, help you make turns, and also accelerate without as much wheel spin in snowy or icy conditions.
  2. Make sure your battery is strong. Cold weather weakens your battery and also makes it harder for your engine to start. These two problems combined can leave you stranded or needing a boost. Have your battery tested before winter to make sure it doesn’t fail on you.
    Tip: If you are leaving on a vacation or planning to let your vehicle sit outside for extended periods of time in freezing weather, disconnect your negative battery terminal. This will eliminate all the small drains on the battery and reduce the chance of it freezing. Once a battery has frozen, it needs to be replaced.
  3. Have your engine coolant checked. Healthy coolant will let your engine turn over more freely on start-up, keep your seals sealing and provide you with good heating .Coolant/antifreeze is designed to stay in it’s liquid form in temperatures ranging from -35 Celsius to -45 Celsius. Over time coolant can leak out, loose it’s ability to resists freezing and also become contaminated with sludge and rust.
  4. Rust proof your vehicle every fall. Having your vehicle sprayed with our dripless anti- rust compound will increase your vehicles life span. The spray forms a protective barrier between your vehicle’s metal surfaces and the rust causing salt and slush. If left unprotected, your vehicle will disappear in front of your eyes.
  5. Avoid Car washes. Driving through a car wash in the winter is not a good idea unless your vehicle will have a chance to adequately dry off afterwards.
  6. Let your vehicle warm up before driving. Allowing your vehicle’s systems to warm up a bit before moving will reduce the chance of breakdowns.
  7. Make sure the vehicle is in tip top shape before winter. Almost every aspect of your vehicle takes a beating in the winter and are more likely to break down in super cold temperatures. Avoid getting stranded or paying a hefty tow bill by having your vehicle inspected and brought up to shape in the fall.

Common Winter Problems:

  • Lack of heating: This can be caused by low coolant, a blocked heater core, stuck thermostat or a faulty blower motor.
  • Car won’t crank: If you turn the key and nothing happens or you hear a clicking noise, this can be caused by a weak battery or faulty starter motor.
  • Car cranks but won’t start: This can be caused by many problems but extreme cold (-30 Celsius) can be solely responsible for an engine not starting, especially diesel engines.
  • Tires keep losing pressure: It is common for your tires to drop 1-2 psi for every 10 degrees of temperature loss. It is also more common for tires to leak around the rim in cold weather.
  • Squealing noise on start-up: Many cars (especially cars with manually tensioned belts) will exhibit a squealing sound in cold temperatures. This can be made worse by worn or improperly tensioned belts.
  • Steering feels very tight on start-up: Your hydraulic power steering system can take a few minutes to start working on very cold days. This is made worse by dirty power steering fluid or a defective pump.
  • Transmission won’t accelerate from drive as fast: This problem is common or high mileage/ older transmissions. Like your power steering it may take time for your transmission to warm up enough to shift and engage properly. Dirty transmission fluid or filter can make this problem worse.
  • Windows, Doors, locks won’t open: They are frozen. Taping the door with your hand around the edges will break up the ice making easier to open. Lock de-icer can be sprayed into the key hole to unfreeze the cylinder and windows should be left closed until they have warmed up. Forcing your window open can break the plastic components in your window regulator.
  • Vibration at high speeds: Snow can build up in your wheels and cause an unbalance. Try brushing the snow out to relieve this problem.
  • Gas mileage goes down: Extra road drag from the snow and slush, cold engines being less efficient than warm ones, winter gas, lower tire pressure, extra idling, winter tires and even denser cold air can cause a noticeable difference in fuel economy. You can easily expect a 15% drop in fuel economy throughout the winter.
Every vehicle on the road today is built with parts and fluids that have a certain expected life span. Whether it’s your engines oil filter that collects all the debris that builds up inside your engine or your spark plugs that get exposed to 700 degrees Celsius 10 times per second, these replaceable and sacrificial components should be replaced on schedule. The maintenance schedule has been created for each vehicle by the engineers who designed them. They have taken into account what items will break down over time/mileage. By following your maintenance schedule you will drastically reduce the chance of a break down and prolong the life of your vehicle. Your vehicles maintenance schedule will be broken down into mileage/ time intervals. Each interval will have a list of items to inspect, replace, lubricate ect. You can use the Mechanic To You maintenance schedule feature to look up your vehicle’s scheduled maintenance or you can look through your owner’s manual.

Here is a list of common maintenance items and why it is important to service them:

  1. Engine oil and filter - The lifeblood of your engine. Your engine would not last 1km without it. It lubricates, cools, cleans and is used in modern variable valve timing/ lift systems. Always use the recommended type of oil! Ex: (ILSAC GF-4 5W20 for a 2006 Toyota Corolla 1.8 l)
  2. Rotating Tires – Rotating your tires ensures that they wear out evenly. The tires that are mounted on the drive axle (either front or back) will wear out faster than the tires that don’t provide drive.
  3. Inspecting/ servicing brakes - At least once a year you should have your brakes looked at or serviced. Since the action of braking creates a lot of heat and dust, it is important to make sure that your brake pads, rotors and calipers are not worn out or are not able move freely.
  4. Engine Air filter - Modern vehicles will have a filter that cleans the air being sucked into the engine. Over time these filters will become saturated with dirt/ dust or sometimes even become poor nesting choice of some small animal. Ensuring you have a clean air filter will allow your engine breather properly and give you optimal power/fuel economy.
  5. Other filters – Depending on what you drive, your vehicle may be equipped with other types of filters: Cabin air filter (cleans the air that goes into the passenger compartment), Fuel filter (keeps small particles from entering your fuel injection system), PCV valve (the engine’s vent, it allows vapours and pressure to be rerouted back into the intake).
  6. Coolant/ Antifreeze - Coolant maintains your vehicles operating temperature and gives you heat in the winter. Over time it collects metal from the passages it flows through. Dirty and corrosive coolant will eat through it’s own seals and loose it’s ability to resists freezing/ boiling. Not good.
  7. Automatic Transmission Fluid/ Filter - If you drive an automatic, your transmission fluid has a hard life. Not only must it lubricate a very hot and super intricate machine but it doubles as the hydraulic fluid that works all the clutches, valves and bands that give you an “automatic shift”. Over time the fluid and filter pick up all the bits of friction material that get burnt off during shifting and any metal debris as well. Keeping your automatic transmission fluid clean and using the proper fluid is vital to one the most expensive components of your vehicle.
  8. Manual Transmission fluid/ Differential Gear Oil - Manual transmissions and differentials also contain oil that goes through a lot of stress. Tight fitting gears and synchronizers in your transmission and drive train require clean oil in order to function properly.
  9. Brake fluid - Brake fluid is the hydraulic fluid that allows you to impart the squeezing pressure required to slow down your wheels. When you press your brake pedal, hundreds of pounds of pressure builds up in your brake fluid lines. This fluid must resist boiling and freezing and must be clean in order for your seals to keep the pressure in. Brake fluid absorbs water at a fast rate and when combined with water it becomes corrosive. Eating away at seals and expensive ABS components. If your brake fluid is black, it is long over-due for replacement.
  10. Lubricating locks and hinges - Spraying your door hinges and locks with a light grease with keep them from rusting and seizing up in the winter.
  11. Timing Belts - Some engines have what’s called a timing belt. The timing belt connect the two ends of the engine’s moving parts together (crankshaft and camshaft). If this belt snaps, it is possible for the pistons to hit the valves (massive damage). This is why it is so crucial to change your timing belt on schedule. Your vehicle is also equipped with drive belt/belts that run your accessories such as the air conditioning, power steering and alternator. Drive belts are less expensive/ crucial to change than timing belts but should be inspected regularly for cracking and wear.

Note:

  • Inspecting your vehicle regularly and paying special attention to items listed in your maintenance schedule, will save you money and stress in the long run. Some maintenance items will wear out faster or later than expected, depending on driving conditions.
Have you ever been driving and saw one of these images pop up on your dashboard? Check Engine Light 
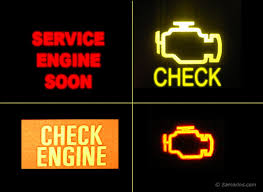
When this light comes on it basically means your vehicles engine control module has detected a problem. There a hundreds of reasons why this light can come on. Depending on the vehicle it could be a problem totally unrelated to the engine.

Here are some commonly asked questions about the check engine light:

  1. Is the vehicle safe to drive? Usually yes, the vehicle is safe to drive as long as it isn’t bucking and chucking or feels like it’s about to stall. Also if the engine light starts to flash, it shouldn’t be driven for an extended period of time as this could result in damage to the catalytic converter.
  2. What should I do when the check engine light comes on? The first step is to hook up the vehicle to a diagnostic scanner and read the trouble code stored in the vehicles computer. These trouble codes will help in diagnosis of the root problem.
  3. Can I disconnect the battery to turn the engine light off? This will turn the light off by erasing the memory from all of your vehicle’s computers. The light will come back on in short time If the problem is still there (ex: misfire or bad oxygen sensor).
  4. Will my vehicle pass an emissions test with the check engine light on? No, the check engine light must be off. Temporarily turning the light off will not get you through the emissions test either since the vehicle’s computer will not be in the “Ready Status”.
  5. What are the common reasons for the engine light coming on? Many different makes and models will exhibit their own common engine light problems but the most common reasons are:
    Loose gas caps (evap leak codes)
    Faulty oxygen sensors (heater circuits or voltage codes)
    Bad catalytic converters (catalyst efficiency codes)
    Engine misfires (specific cylinder, or random cylinder codes)
    Incorrect air/fuel ratios (lean or rich codes)
  6. How much will it cost to turn the engine light off? This will all depend on what the root cause of the problem is. Some problems are as cheap and easy and replacing your gas cap ($30) and others and expensive as replacing your entire catalytic converter assembly (hundreds).
Modern vehicles have longer and longer service intervals (sometimes only once per year) and full service gas stations where they check your oil and fluids are a thing of the past. These long periods of time without checking can allow slow leaks or minor consumption problems to turn into major problems. Knowing how to check your vehicles fluids and what to look for in terms of colour and smell will help you avoid serious breakdowns before they happen.

Here is a list of the most common fluids that you will find on your vehicle and what to look for when checking them.

  1. 1)Engine oil – This is the most important fluid to keep an eye on. The engine oil is critical to your vehicles most expensive part.
    • Park vehicle on level ground.
    • Turn engine off and pop hood.
    • Locate engine oil dipstick (usually yellow in colour and might even say oil on it but check your manual if you aren’t sure).
    • Oil dipstick
    • Pull the stick up and wipe it off with a rag.
    • Put the dipstick back into the tube and push it in all the way.
    • Pull out stick again and check the level.
    • Oil Dipstick
    • If the oil is brown and at the top dot or “full mark”, you are good.
    • Very black oil indicates that it is dirty and in need of changing.
    • If the oil is low or not even showing on the stick, add the correct type of oil through the engine oil filler hole. (Add small amounts at a time and recheck the level.)
    • Do not overfill!
  2. Engine coolant – Be very careful when checking coolant. NEVER REMOVE THE RADIATOR CAP WHEN THE ENGINE IS RUNNING OR IF THE CAP IS HOT TO THE TOUCH. The coolant system is under pressure and can spill over if you don’t open the cap slowly with a rag over your hand.
    • Different makes and models will use different types of coolant. Different coolants do not necessarily mix with any other coolant of the same colour. Most universal long life coolants will say on the back of the bottle what they will mix with.
    • Coolant is sold either in its concentrated form or pre mixed. If you buy the concentrated form, it is best to mix it with de-ionized water at a ratio of 50/50.
    • Most vehicles will have an overflow tank, pressurized tank or a separate cap for the radiator itself. If the cap holds pressure it will have a warning on it. Do not open a pressurized cap when it is hot or if the engine is running.
    • Once you locate your reservoir and or pressure tanks, slowly remove the cap with a rag over your hand for protection. Top up levels to the high mark and replace the cap.
    • Test the coolant strength with a coolant tester (the tool looks like a turkey baster). Also make note of how easy it is to see through the fluid. Light should be able to pass through. If not, the coolant is dirty and should be changed.
    • Engine Coolant
    • Engine Coolant
    • Replace the pressure cap and start the engine.
    • Slowly remove the cap with a rag again before the engine has time to heat up and add coolant if needed. It may be necessary to allow the engine to run with the cap off until it reaches normal operating temperature in order to bleed out any air bubbles stuck in the system. If there are bubbles that escape through the open tank, the level will go down.
  3. Brake Fluid – The hydraulic brake system is a sealed system. You should never really have to add fluid unless your brakes pads/ shoes are totally worn out or if you have a leak. You can find your brake fluid reservoir against the back of the engine compartment on the driver’s side.
    • If fluid level is dropping quickly or if your brake pedal feels spongy, you probably have a leak somewhere and the vehicle is unsafe to drive.
    • Never put anything other than brake fluid into your reservoir, any other type of oil will destroy all the seals in your hydraulic system.
    • Black brake fluid is an indication of contaminated brake fluid. It should be flushed out with new fluid.
    • Don’t leave your brake reservoir cap off or remove it frequently as brake fluid easily absorbs water from the air.
    • brakes
  4. Automatic Transmission fluid- Today it is becoming less and less common to actually have a transmission oil level dipstick. Since transmission fluids vary so much and fluid levels are so crucial to operation and longevity, many manufacturers have decided to not include them in order to protect the transmission from improper filling. If you have an automatic transmission and have a dipstick, here is how you can check your fluid:
    • The engine must be at normal operating temperature.
    • Park the vehicle on a level surface.
    • Consult your owner’s manual on the location and exact procedure for checking the fluid level. (Some vehicles must be running in park and some vehicles must be turned off).
    • Pull dipstick out and wipe off.
    • Replace dipstick and pull out again. Make note of the fluid level (Fluid should be at hot line or dot).
    • Also make note of the fluid colour and smell. Automatic transmission fluid is usually red and semi-translucent. If it is dark brown or black, it should be changed. If the fluid smells very strong of burnt plastic/ hair, it is an indicator of internal problems inside the transmission.
    • Pink or milky transmission fluid is and indicator that it is mixing with coolant inside the radiator.
    • Top up fluid with a small funnel. Add small amounts at a time (.25 litre) and recheck. Once you have attained the full mark, take the vehicle for a drive and then recheck the fluid level.
    • Low fluid level can cause transmission slipping and premature breakdown.
  5. Manual transmission fluid – Most vehicles do not have a dipstick for manual transmissions. Generally they have a fill plug that also acts as a level indicator. These fill plugs are generally accessed from underneath the vehicle and are not easy to inspect at home. If you do have a manual transmission dipstick you can easily check your level.
    • Park vehicle on level ground and shut off engine.
    • Pull out dipstick, wipe and replace.
    • Pull out dipstick, wipe and replace.
    • Check level (Fluid should be at high mark).
    • Add if needed (add very little at a time since manual transmissions have low fluid capacities).
    • Manual transmission fluid is generally thicker gear oil. It will range in colour depending on brand but should never be totally black or opaque.
  6. Power steering fluid- If your vehicle has hydraulic power steering, you can check the level and condition of your fluid.
    • Consult your owner’s manual for the location of the power steering reservoir
    • Shut off the engine
    • Remove the reservoir cap and check level. (Some vehicles will have a dipstick attached to the reservoir cap and some will have full and low marks on the reservoir).
    • Make sure you add the correct power steering fluid
    • Start up the vehicle and turn the steering wheel side to side about 10 times and recheck the level.
    • Start up the vehicle and turn the steering wheel side to side about 10 times and recheck the level.
    • Power steering fluid will usually be red or yellow, it should never be dark brown or black.
    • If the power steering level is low the pump will make a high pitch whining sound when the steering wheel is turned.
    • If the fluid goes low enough the pump will run dry, you will lose your power assists and the pump will eventually burn out.
  7. Windshield Washer Fluid- This is the most basic fluid to check/fill on your vehicle.
    • Locate the washer fluid reservoir
    • Fill the reservoir until the fluid almost spills out.
    • Use winter washer fluid all year. This will reduce the chance of summer fluid freezing in your tank/lines if left in freezing temperatures.
    • If your washer nozzles still won’t spray when the fluid is topped up, suspect a faulty washer pump or disconnected line. (You should hear the pump buzzing when you pull the washer leaver).
  8. Differential Oil- Differentials are the final gear reduction in your drive train. They allow power from your engine to be turned 90 degrees and also allow your drive wheels to spin at different speeds.
    • Very few vehicles will have a dipstick for checking differentials. Some Subaru vehicles will have a dipstick for the front differential. (If there is a dipstick, follow the same procedure as checking manual transmission fluid).
    • Usually differential fluid is checked by removing the fill plug. The fluid level is full if it just reaches the bottom of the fill plug hole. (Not easily checked at home).
    • Differential fluid is usually thick golden gear oil. It should never be black.
    • Some positraction differentials require a special friction modifier fluid mixed in with gear oil.
  9. Tips
    • If you notice oil spots on your driveway, have your vehicle inspected to see if the leak is urgent, some oil leaks are so slow that they never really require attention.
    • Road de-icer can sometimes built up under your vehicle during winter. The de-icer will then drip back down on the ground. These drops usually form yellow green spots in the snow.
Many different types of noises will pop up while driving your vehicle. While it is very hard to diagnose these noises without actually inspecting the vehicle, here are some common issues that will cause noises;
  1. High pitch squeal on start up or accelerating from a stop: Suspect a worn or loose drive belt.
  2. Loud rumble, vehicle suddenly sounds like a race car: Leak in the exhaust system.
  3. Grinding noise coming from the wheels when brake pedal is applied: Brake pads or shoes have worn down past their limit and the metal backing of the pad is grinding into the brake rotor.
  4. High pitch squealing when pressing the brakes: Brake pads can squeal for a few reasons, they may be worn down to the point where the “squealer tab” is contacting the rotor. The brake rotor or drum may have ridges that are causing the squeal and sometimes even just the type of material the pads are made of will squeal.
  5. Pulsating noise/feeling on the brake pedal when pressing the brakes: This usually indicates a brake rotor or drum that has become warped.
  6. Humming noise that increases with vehicle speed: This is usually caused by a worn wheel bearing or noisy tires. If the noise changes when shifting the steering wheel side to side, suspect a wheel bearing.
  7. Rough scraping noise coming from the wheels (especially when taking corners): This can be caused by rust build up on the thin metal plate behind the brake rotor or rust on the rotor itself.
  8. Very pitch rattling/ buzzing noise that will come and go at different engine speeds: Suspect an exhaust heat shield that has come loose.
  9. Deep clunking noise over bumps: This can be caused by a worn out suspension component like sway bar links, ball joints, tie rods, struts or bushings
  10. Creaking noise when turning the steering wheel at a stop: Suspect worn strut bearings or dried out tie rods/ ball joints.
  11. High pitch hum when turning the steering wheel: This is usually caused by low power steering fluid or the power steering pump itself.
  12. Note:

    • Sometimes noises will sounds like something they aren’t. It is always a good idea to check out any new noise as they pop up. Some noises can be indicators of urgent problems and some can be just minor annoyances.
Still have a question? Contact us!